The No-Bake Brownie Icebox Cake is the ultimate solution for chocolate lovers who crave a decadent, multi-layered dessert without ever turning on the oven. Imagine a foundation of dense dark chocolate brownie, topped with a velvety cream cheese layer, airy chocolate mousse, and clouds of whipped cream. This is the dessert that stops the scroll on Pinterest and becomes the centerpiece of every summer gathering.
Every bite of this No-Bake Brownie Icebox Cake offers a masterclass in texture. You get the fudgy bite of the base, the tang of the cream cheese, and the melt-in-your-mouth luxury of the dark chocolate shavings. It is a visually stunning masterpiece that looks like it came from a high-end bakery but requires zero baking skills.
If you are looking for a dessert that balances rich cocoa notes with light-as-air whipped topping, you have found it. This recipe is specifically designed to be prepped ahead of time, allowing the layers to meld into a cohesive, sliceable dream. Much like our popular Italian coffee gelato, this cake relies on chilling time to achieve its perfect, professional-grade consistency.
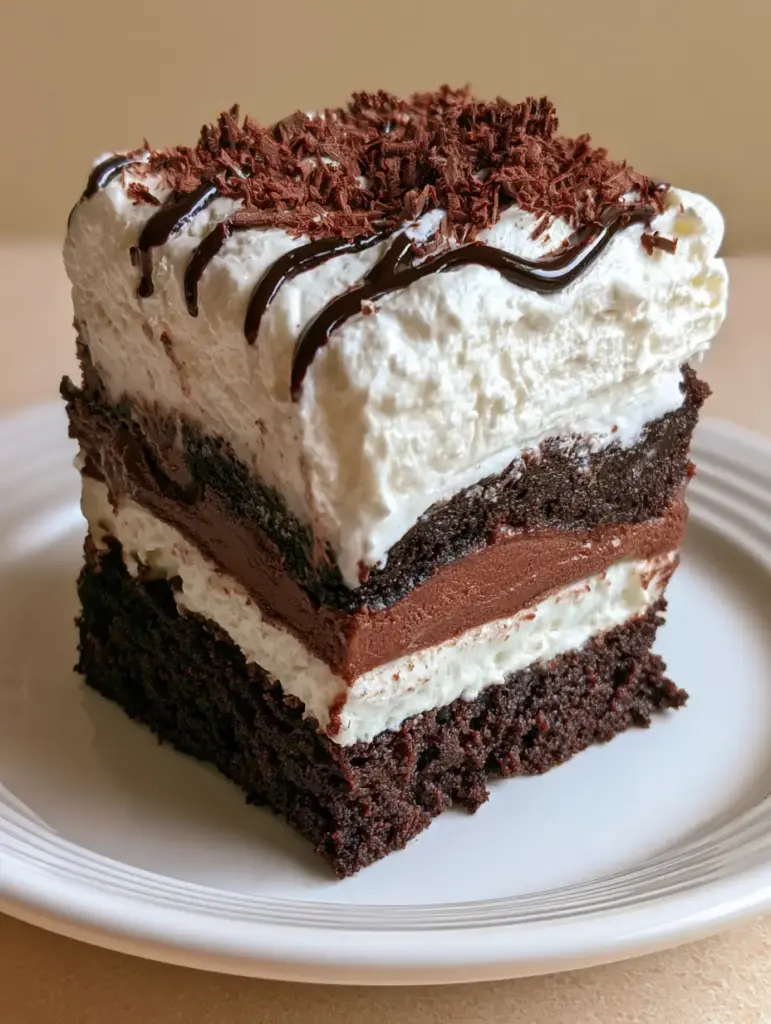
Why You Will Obsess Over This No-Bake Brownie Icebox Cake
- Textural Perfection: The contrast between the thick, dense brownie foundation and the fluffy whipped cream creates a sensory experience that keeps you coming back for more.
- Zero Oven Time: Perfect for hot summer days or when your oven is occupied by roasted red pepper stuffed chicken for a dinner party.
- Visual Showstopper: With its clearly visible side layers and elegant zigzag drizzle of chocolate syrup, it is the definition of “Pinterest-worthy.”
- Make-Ahead Magic: This cake actually tastes better the next day, making it the ultimate stress-free hosting dessert.
The Anatomy of a Perfect Chocolate Icebox Cake
To achieve the specific “Visual Recipe Blueprint,” we focus on high-quality ingredients that provide stability and flavor. Each layer serves a specific culinary purpose.
The Dense Brownie Base: We use 2 cups (300g) of finely crushed fudgy brownies (store-bought or leftover) mixed with 4 tbsp (57g) of melted unsalted butter. This creates that dense dark chocolate brownie foundation that supports the weight of the upper layers.
The Chilled Cream Cheese Layer: 8 oz (226g) of full-fat cream cheese provides the structural integrity and a subtle tang that cuts through the richness of the chocolate. Combined with 1/2 cup (60g) of powdered sugar, it stays solid and white even after slicing.
The Smooth Dark Chocolate Mousse: This layer uses 1 cup (175g) of high-quality dark chocolate chips melted into 1/2 cup (120ml) of heavy cream, then folded into whipped cream. It must be smooth and decadent to match the blueprint.
The Fluffy Whipped Topping: 1.5 cups (360ml) of heavy whipping cream beaten to stiff peaks. This acts as the “cloud” for our garnishes. It provides the height needed for those impressive side-profile photos.
The Final Accents: Dark chocolate shavings and a thin, precise zigzag drizzle of chocolate syrup. These aren’t just garnishes; they provide the visual cues of a professional “handheld smartphone photo” aesthetic.
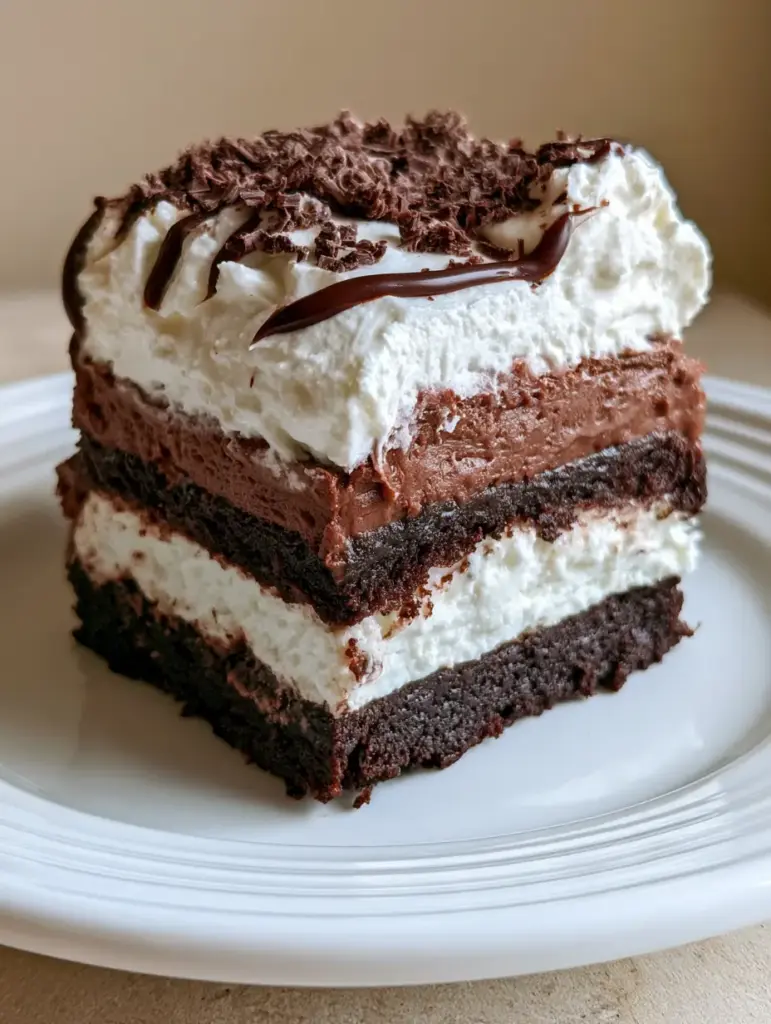
Step-by-Step Guide to Layering Your Masterpiece
Step 1: Constructing the Fudgy Foundation
Start by lining an 8×8 inch (20×20 cm) square pan with parchment paper, leaving an overhang on the sides. This is crucial for lifting the No-Bake Brownie Icebox Cake out later for those perfect square slices.
Mix your brownie crumbs and melted butter until the mixture resembles wet sand. Press it firmly into the bottom of the pan. You want a thick, dense dark chocolate brownie foundation. Use the bottom of a measuring cup to pack it down tightly so it doesn’t crumble when sliced.
Step 2: The Velvety Cream Cheese Center
In a medium bowl, beat the softened cream cheese, powdered sugar, and a splash of vanilla until completely smooth. Fold in 1/2 cup (120ml) of prepared whipped cream to lighten the texture slightly while maintaining that solid white layer look.
Spread this evenly over the brownie base. Use an offset spatula to ensure the layer reaches the very edges of the pan. This ensures the layers are clearly visible from the side when the cake is cut.
Step 3: Whipping the Dark Chocolate Mousse
Melt your dark chocolate and 1/2 cup (120ml) of cream together until glossy. Let it cool to room temperature—if it’s too hot, it will deflate the mousse. Fold this chocolate ganache into 1 cup (240ml) of stiffly whipped cream.
The result should be a smooth dark chocolate mousse layer. Spread this over the cream cheese layer gently. If you’re also prepping a breakfast lasagna for the morning, you’ll appreciate how quickly these no-bake layers come together!
Step 4: The Fluffy Finish and Garnish
Top the mousse with the remaining whipped cream. Use a spoon to create soft decorative swirls. Now for the signature look: sprinkle fine dark chocolate shavings across the top and finish with a thin, precise zigzag drizzle of chocolate syrup.
Place the cake in the refrigerator. For the best “handheld smartphone photo” results, the cake needs to chill for at least 6 hours, or preferably overnight. This allows the No-Bake Brownie Icebox Cake to set firmly enough to reveal those sharp, clean layers.
Expert Tips for Pinterest-Perfect Slices
- The Clean Cut: Use a sharp knife dipped in hot water and wiped dry between every single cut. This is the secret to seeing every layer clearly from the side.
- Temperature Control: Ensure your cream cheese is truly at room temperature before mixing to avoid lumps in your solid white layer.
- Chocolate Quality: Use a dark chocolate with at least 60% cocoa for the mousse. This provides the deep color contrast against the white whipped cream.
- Parchment Sling: Never skip the parchment paper lining. It allows you to lift the entire cake out of the pan before slicing, preventing the first slice from being messy.
How to Store and Freeze Your Icebox Cake
This No-Bake Brownie Icebox Cake should always be stored in the refrigerator. Cover it loosely with plastic wrap or store it in an airtight container to keep the whipped cream from absorbing fridge odors. It will stay fresh and delicious for up to 4 days.
If you want to freeze it, this cake transforms into a wonderful frozen treat! Wrap the entire pan (or individual slices) tightly in plastic wrap and then foil. It can be frozen for up to 1 month. Thaw in the fridge for 2 hours before serving to regain that smooth dark chocolate mousse consistency.
What to Serve With This Chocolate Delight
Because this cake is incredibly rich and dense, it pairs beautifully with something savory or acidic. Serve it after a meal of slow cooker French dip sandwiches to balance the salty and sweet profiles.
If you are hosting a cozy dinner featuring a homemade ramen recipe, the chilled, creamy texture of the icebox cake provides a refreshing finish to the warm, umami-rich soup. A cup of strong espresso or a glass of cold milk is also a classic companion.
Frequently Asked Questions
Yes! In fact, store-bought fudgy brownies are perfect for this No-Bake Brownie Icebox Cake because they provide the dense, moist foundation needed for the layers to stay stable.
Absolutely! This cake is actually better when made 24 hours in advance, as the layers have time to set and the flavors to meld perfectly.
The secret is chilling the cake for at least 6 hours (or overnight) and using a sharp knife dipped in hot water and wiped dry between each cut.
While cream cheese provides the best stability, you could use Mascarpone for a milder, creamier flavor, though it may be slightly softer.
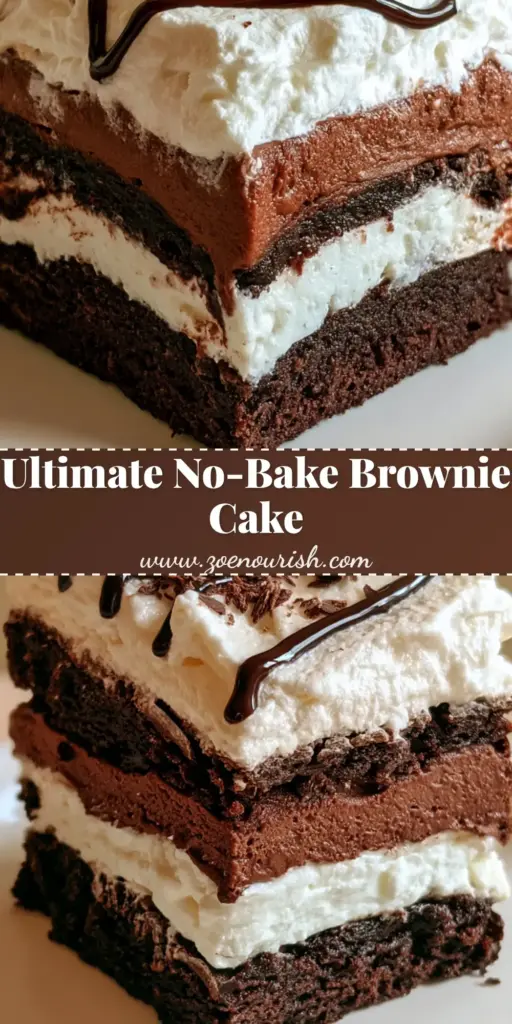
No-Bake Brownie Icebox Cake: The Ultimate Recipe Card
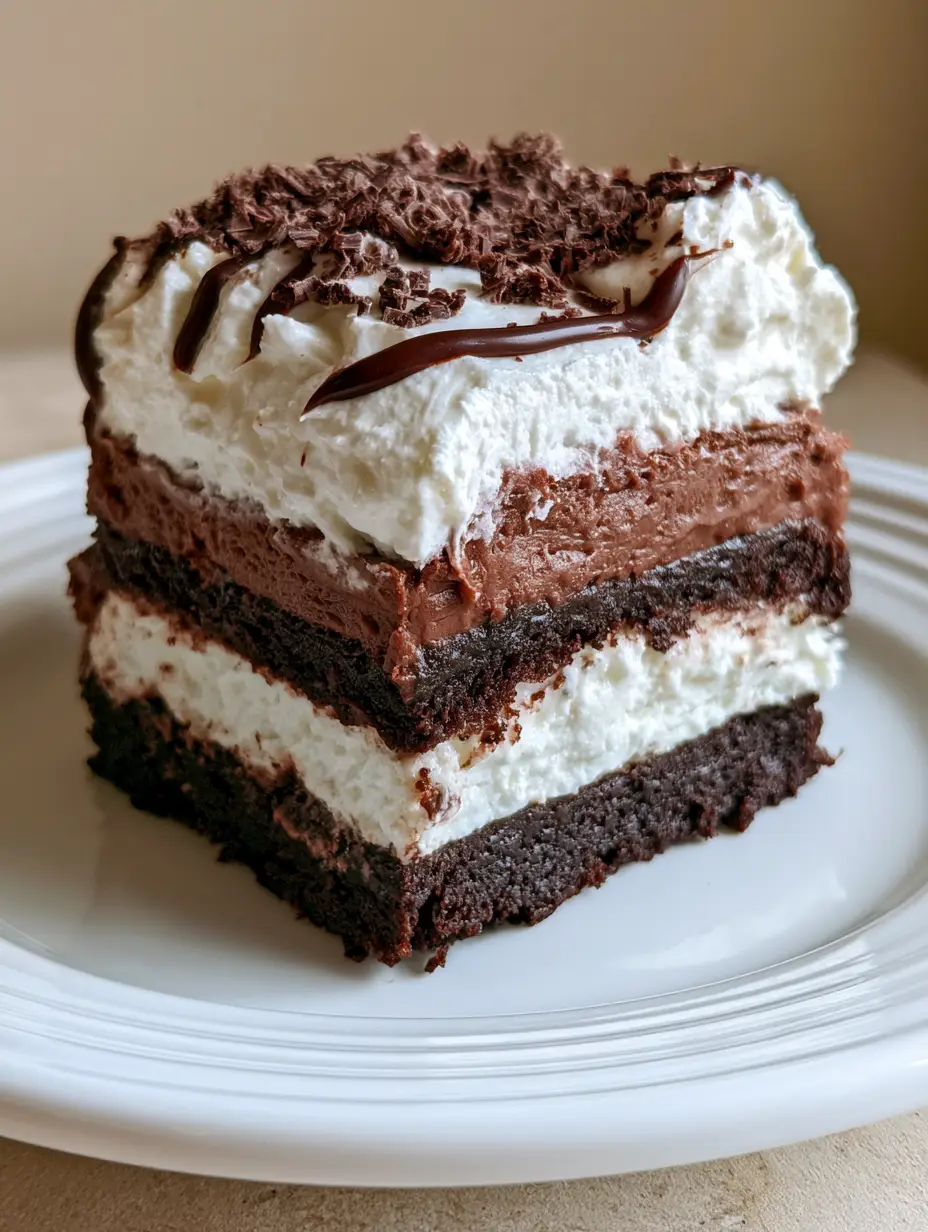
No-Bake Brownie Icebox Cake with Silky Chocolate Mousse
Ingredients
Equipment
Method
- Combine brownie crumbs and melted butter. Press firmly into the bottom of a parchment-lined 8x8 pan to create a dense foundation.
- Cream together softened cream cheese, powdered sugar, and vanilla. Fold in 1/2 cup of whipped cream and spread over the base.
- Melt chocolate chips with 1/2 cup cream. Cool slightly, then fold into 1 cup of whipped cream. Spread as the third layer.
- Top with remaining whipped cream. Garnish with chocolate shavings and a precise zigzag of chocolate syrup. Chill for at least 6 hours.
Notes
Tip 2: Ensure the brownie crumbs are finely ground for a sturdy base.
Save This Recipe for Later!
If you loved this No-Bake Brownie Icebox Cake, please head over to Pinterest and save it to your “Dessert Goals” or “No-Bake Recipes” board! Following zoe_nourish helps us bring you more viral-ready treats every week.
Did you make this? We want to see! Post a photo of your beautiful layers in the comments below or tag us on social media. Don’t forget to leave a 5-star rating in the recipe card above—it helps other home cooks find this chocolatey goodness!